
SheevaPlug Unboxing and Ubuntu Install
It finally arrived! I woke up last week to find that there was a small box waiting for me to open.
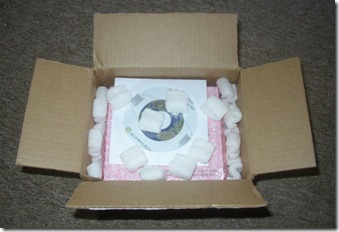

It was packaged surprisingly well. I’ve never purchased a dev kit before, but this was packaged better than any retail gadget I’ve purchased. Very impressed.
Installing Ubuntu
I originally wanted to install Gentoo, however I really didn’t want to go through the work of learning how to compile for this device,especially considering Marvel has already included an Ubuntu image already optimized for the device.
Install was a pain, only because I didn’t realize that the plug was already set up with Ubuntu installed! I made a few stupid moves and found myself having to start over.
The Marvel documentation is a good place to start if you’re trying to install Ubuntu on the SheevaPlug. All the files and documentation you need are found on the SheevaPlug Dev Kit page.
Installing Ubuntu consisted of using the USB serial connection (I used PuTTY, be sure to install the USB driver as directed in the documentation and connect at 115200) to talk to the Plug, installing a tftp and nfs server on my linux image, telling the Plug to go to the tftp server to grab the image that would allow it to boot from nfs and finally allow me to install the Ubuntu image onto the device. It really took me hours, since I ran into so many stupid issues caused by my ignorance of using tftp and nfs.
I made the silly mistake of doing a dist-upgrade through aptitude. I eventually installed the Ubuntu image all over again because this made the device really unstable.
It appears that when you boot off NAND, the OS is loaded into RAM as a ramdisk. That’s why some directories (like /var/apt/cache) are cleared after a reboot. Because of this, I followed the openplug.org walkthrough on installing the OS onto my 4GB class 6 SDHC card. The result: bootup is much faster along with generally better performance all around.
My next post will be about setting up the Plug as my LAMP server (well, now it’s my LLMP server).
Comments
SheevaPlugUser
Hi Man,
can you please post HOW you reinstalled Ubuntu on it?
I made the same mistake of upgrading the dist. and now its kinda bricked ... I can talk to the plug via putty, but I dont know what to do from there, or from where to get the right Ubuntu image.
Thanks man!
W.
bradford
W,
Since I installed they have made an easier way to install the kernel on the device. And really, mine was bricked again, and I was not looking forward to installing the kernel again. It involves a tftp and nfs server and is a royal pain in the butt - maybe not if you're an expert but I'm not really.
But good news, they have a USB recovery package that makes it REALLY easy to re-flash your kernel. It entails updating our u-boot to support USB flashing, then flashing the image directly from a USB drive. You can download the instructions at http://openplug.org/index.p... (openplug.org changes a lot, so if that link doesn't work go to openplug.org and find downloads). The USB recovery is under "SheevaPlug Software & Design Information - Revision 1.2" and is called "SheevaPlug_USB-Recovery1.2". The pdf in that zip file is very good and will guide you in upgrading your u-boot (you do need a tftp server to do that) and then using a simple flash drive to install your kernel. I've done it twice and its very easy.
bradford
Actually, that zip package I pointed out is just the image files necessary to boot from the usb drive - the instructions are in the documentation package found on the same page of openplug.org. Good luck!
SheevaPlugUser
Bradford,
Cheers for that, will give it a try now, and yeah, i noticed that tftp servers a massive pain in the arse ...
Thanks again for that link!
SheevaPlugUser
Oh, one more thing, you wouldnt happen to know how to reset all the boot vars and environment variables to default, would you? =)
Cheers,
W.
bradford
W,
Good luck with that. I'm sorry, I don't know of any such command to reset your variables. You should be good, as long as your tftp settings are set correctly on the plug (they're not called that, I think it's 'set serverip' or something to set up what your tftp server ip is). The instructions for that is in the documentation package. Once you get it to upgrade u-boot (using the bubt command I think) from tftp you're golden, as the rest of the steps involve plugging in a usb drive and a couple other commands.
W
Hi man,
thanks for the help, I finally managed to fix it. I was actually getting stuck at the bubt part, where you have to flash the whole thing, after excessive googleing I stunbled across this: http://www.plugcomputer.org...
Literally all you have to do is put the stuff on a FAT32 usb stick, plug it into the plug and run the script prvided via a linux box and wait ... thats it =)
Thx again for your help man!
W.
bradford
W, Wow, thanks for that link. Looks great - I had heard about the installer but I didn't look into it. I've had to use the recovery kit a couple times, bad crc error which I haven't figured out. I'm using an Ubuntu VMware appliance on my Windows 7 laptop that I use for troubleshooting my plug. It's great - whenever I don't need it I simply shut it down and when I have trouble I bring it up again.
I'm glad to see you worked it out, I think before long it will be really easy to flash the plug. But the first time I did it I spent hours and hours trying to set up nfs and tftp.
Bradford